Welding Procedure Qualification Test (PQT) Witnessing Guide
A welding procedure qualification test (PQT) is the single event that determines whether a Welding Procedure Specification (WPS) can ever be used in production. Everything that happens on the day of the test — the material verified, the essential variables recorded, the specimens cut and tested — becomes the permanent basis of the Procedure Qualification Record (PQR). If the witnessing is weak, the PQR is weak, and every production weld made against that WPS inherits the gap. This guide sets out exactly what an inspector, whether an ASME Authorised Inspector, a Third Party Inspection (TPI) engineer, or an in-house QA/QC witness, should check before, during, and after a PQT.
This is written primarily around ASME Section IX requirements, since that is the qualification basis most commonly encountered on pressure vessel, piping, and boiler fabrication contracts, with reference points to AWS D1.1 structural practice where the two diverge. Whether you are new to inspection duties or refreshing a checklist before a client audit, the sequence below reflects how a disciplined witness actually works through a qualification test on the shop floor.
Why Witnessing Matters More Than the Paperwork
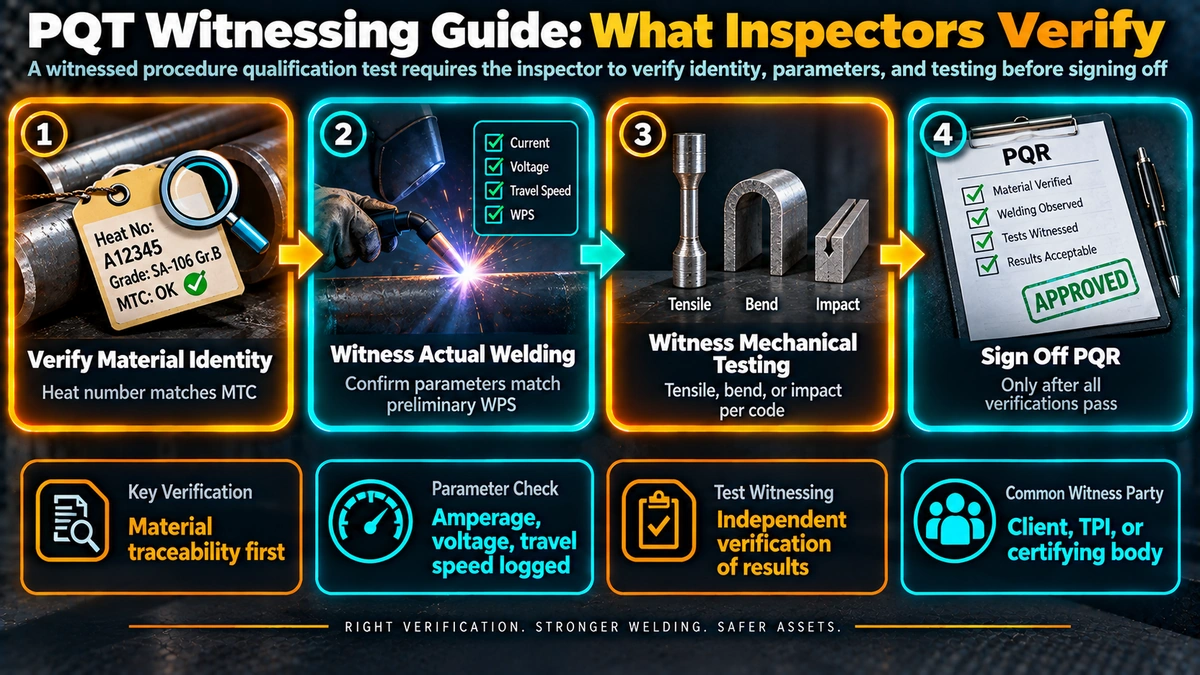
A signed PQR is only as trustworthy as the person who watched it happen. Fabricators are not being dishonest when a PQR is later found deficient — more often, a variable was recorded from memory after the fact, a thermocouple was not actually reading interpass temperature at the moment it mattered, or a coupon was re-ground and re-numbered between welding and testing without anyone independent present to confirm traceability. Independent witnessing closes exactly these gaps, and it is the reason codes like ASME Section IX give the Authorised Inspector standing to observe the test coupon being welded and tested, per ASME Section IX qualification requirements.
Step 1: Document Review Before the Arc Is Struck
Witnessing does not begin when the welder picks up the torch. It begins in the office, checking that everything the fabricator intends to weld and test actually matches what has been proposed. Skipping this step is the single most common reason a PQT has to be repeated.
Documents to Request in Advance
- The draft or preliminary WPS listing the proposed essential, supplementary essential (if impact testing applies), and nonessential variables.
- Material Test Reports (MTRs) for the base metal coupon, confirming P-Number and Group Number classification.
- Filler metal certificates confirming F-Number, A-Number, and classification, cross-checked against consumable nomenclature.
- Calibration certificates for the welding machine ammeter/voltmeter, and for any thermocouples, contact pyrometers, or preheat monitoring equipment.
- The qualification test plan (QTP), listing which specimens will be cut, in what sequence, and against which acceptance table.
- Confirmation of coupon size against the code figure (ASME IX QW-462 series, or AWS D1.5 figures for bridge work).
Confirming the Essential Variables Before Welding
Every process has its own essential variable table in QW-250. Reviewing these before welding starts, rather than after, lets the inspector flag a problem while it is still cheap to fix. A short pre-weld check should cover:
| Variable Category | What to Verify | Typical Reference |
|---|---|---|
| Base metal | P-Number / Group Number, thickness, whether it qualifies the intended production range | QW-403, QW-451 |
| Filler metal | F-Number, A-Number, classification, diameter | QW-404 |
| Position | Test position matches or exceeds intended production positions | QW-405 |
| Preheat / interpass | Minimum preheat met; maximum interpass not exceeded | QW-406 |
| PWHT | Whether the coupon will undergo post-weld heat treatment matching production intent | QW-407 |
| Gas / flux | Shielding gas composition, flow rate, or flux type and brand | QW-408, QW-404 |
| Electrical characteristics | Current type/polarity, heat input where applicable | QW-409 |
Step 2: Coupon Setup and Traceability Checks
Once the paperwork is in order, the inspector’s role shifts to the shop floor. Traceability is the theme of this stage: confirming that the piece of metal in front of you is the same piece described in the MTR, and that it will remain identifiable all the way through to the finished PQR.
- Confirm coupon dimensions against the applicable code figure, with enough extra length to allow discard ends plus all planned specimens.
- Verify joint preparation: groove angle, root gap, root face, and backing (if any) match the WPS being qualified.
- Check that joint type and design is representative of the intended production joint, since a fillet-only qualification will not support groove welds.
- Confirm the welding position being used for the test and that it is recorded correctly, since position governs which production positions the resulting WPS can qualify.
- Note ambient conditions if wind or moisture shielding is a concern for the process being tested (this matters particularly for FCAW-S and SMAW in open shop conditions).
Step 3: Witnessing the Welding Itself
During welding, the inspector’s job is continuous observation of the variables that were confirmed in Step 1, not just a single glance at the start. Parameters can and do drift over a multi-pass weld, and a PQR is only valid for the range actually used during the test.
What to Record Pass by Pass
- Amperage and voltage for each pass, read directly from calibrated meters rather than the welder’s estimate.
- Travel speed, either timed directly or calculated from pass length and time.
- Interpass temperature immediately before starting each subsequent pass, taken at the correct location per the WPS (commonly measured 50 mm or 3 in from the weld toe, code-dependent).
- Interpass cleaning method observed between passes (wire brush, grinding) and whether it matches the WPS.
- Number of passes and layers, and whether stringer or weave technique was used if that is an essential variable for the process.
Step 4: Visual Inspection and NDE Before Mechanical Testing
Before any specimen is cut, the completed coupon should pass visual inspection, and radiographic or ultrasonic examination where the code or QTP calls for it. This step exists to screen out gross defects before investing in mechanical testing that would be invalidated by an underlying flaw anyway.
Step 5: Witnessing Specimen Extraction and Mechanical Testing
This is the stage most often under-witnessed, because inspectors sometimes assume that once welding is complete, their job is finished. In practice, specimen extraction and testing introduce their own sources of error, and an inspector who leaves before this stage cannot vouch for the numbers that ultimately appear on the PQR.
Specimen Extraction
- Confirm specimen locations match the code figure and the QTP, not an arbitrary cutting plan.
- Verify machining removes weld reinforcement correctly for tensile and bend specimens per the applicable dimension tables.
- For impact testing, confirm notch location and orientation relative to the weld centreline and fusion line, since a mis-located notch invalidates the result even if the number looks acceptable.
- Check specimen identification is transferred and maintained through machining, so each result can be traced back to its exact coupon location.
Mechanical Testing
| Test | What the Inspector Confirms | Typical Acceptance Basis |
|---|---|---|
| Tensile | Machine calibration current, specimen dimensions, fracture location and mode | Minimum specified tensile strength of base metal Pass |
| Guided bend | Correct former/jig radius, bend angle achieved, surface examined after bending | No crack/defect exceeding code limit Pass |
| Impact (CVN) | Test temperature, notch location, machine calibration | Minimum average and single-value energy per code table Conditional |
| Hardness | Test locations across weld/HAZ/base metal, indenter calibration | Maximum hardness per material/service class Pass |
Step 6: Reviewing Results and Signing Off the PQR
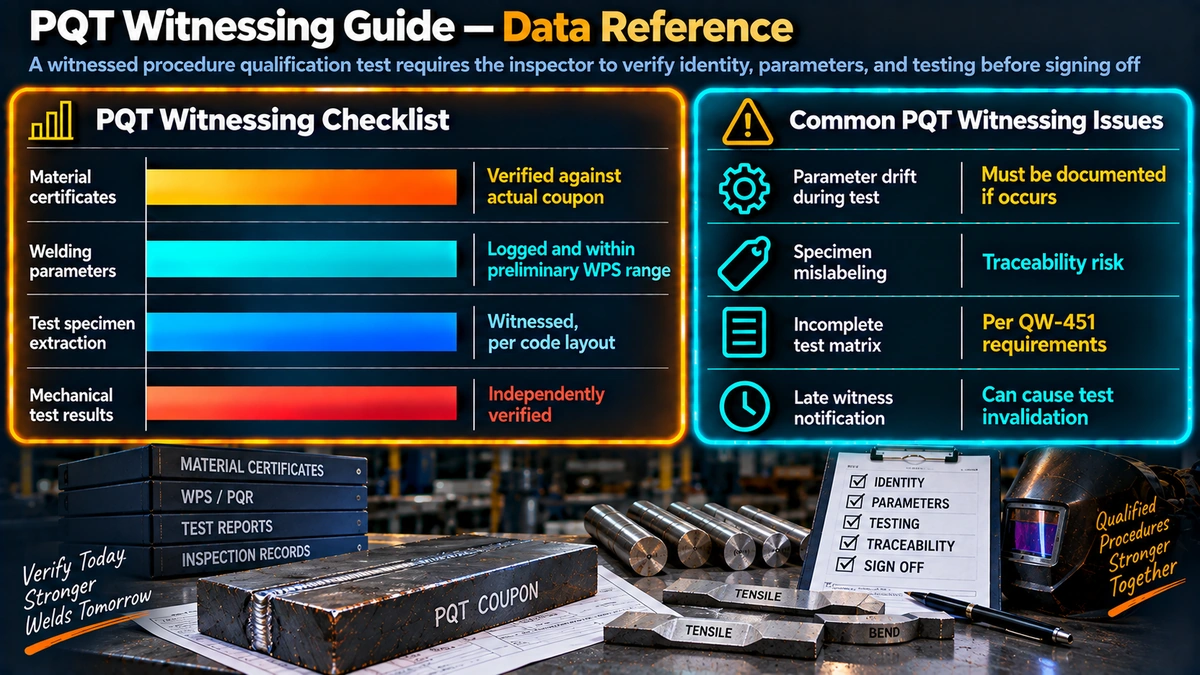
Once test results are in hand, the inspector’s final task is to check that the recorded essential variables on the draft PQR match what was actually observed, not what was originally planned. Any variable that drifted outside the qualified range during welding — for instance, an interpass temperature excursion — needs to be reflected honestly on the PQR, even if it makes the record less tidy than it would otherwise be.
- Cross-check every essential variable box on the PQR against your own witnessing notes, not the fabricator’s summary alone.
- Confirm supplementary essential variables are included if the WPS will be used where impact testing is mandatory.
- Verify the PQR carries the correct coupon identification, welder identification, date, and your own signature or stamp as witness.
- Retain your own independent notes and photographs; these are often the only defence if a PQR is challenged during a later audit.
PQT Witnessing: ASME IX vs AWS D1.1 at a Glance
| Aspect | ASME Section IX | AWS D1.1 |
|---|---|---|
| Governing party for witnessing | Authorised Inspector or client TPI per contract | Engineer or independent testing agency per contract |
| Essential variable tables | QW-250 series, per process | Table 4.5/4.9 prequalified vs qualified WPS distinctions |
| Prequalified WPS option | Not applicable; ASME IX has no prequalified route | Prequalified WPS available under Clause 4, no PQT needed if within limits |
| Impact testing trigger | Per governing construction code (e.g. Section VIII UG-84) referencing Section IX | Per contract/engineer requirement, notably in bridge and low-temperature work |
Common Non-Conformances Found During PQT Witnessing
- Coupon thickness that does not actually cover the intended production thickness range once QW-451 is checked properly.
- Filler metal classification on the spool not matching the certificate presented at the start of the test.
- Preheat verified once at the start of the joint but not re-checked through a long multi-pass weld.
- Bend specimens ground excessively smooth before visual examination, masking small surface discontinuities.
- Impact specimens machined with notch on the wrong side of the weld centreline for the intended test location (weld metal vs HAZ).
Amazon Picks for Inspectors and QA/QC Engineers
ASME Section IX Code Book
The current edition covering welding and brazing qualifications, essential for cross-checking QW-250 tables during any PQT witnessing assignment.
View on AmazonWelding Inspection Handbook
A practical reference for visual inspection criteria, weld defect identification, and inspection sequencing used by CWI and TPI professionals.
View on AmazonDigital Contact Pyrometer
A calibrated surface-contact thermometer useful for spot-checking preheat and interpass temperature readings during a witnessed test.
View on AmazonWelding Metallurgy Reference
Background reading on how heat input, cooling rate, and filler dilution affect the mechanical properties being tested in a PQT.
View on AmazonDisclosure: WeldFabWorld participates in the Amazon Associates programme (StoreID: neha0fe8-21). If you purchase through these links, we may earn a small commission at no extra cost to you. This helps support free technical content on this site.
Frequently Asked Questions
Who is authorised to witness a PQT?
Under ASME Section IX, the organisation performing the qualification is responsible for the test, but the Authorised Inspector (AI) on ASME jobs, or a Third Party Inspection (TPI) agency where specified by contract, must be given the opportunity to witness the welding of the test coupon and the subsequent mechanical testing. On non-ASME work, witnessing is typically performed by the client’s QA representative, a nominated TPI agency, or a certifying body, depending on the governing code and contract requirements.
What is the difference between witnessing a PQT and witnessing a WPQ?
A PQT proves that a welding procedure produces a weld with the required mechanical and metallurgical properties, documented on a PQR. A WPQ proves that a specific welder can execute an already-qualified WPS correctly. Witnessing a PQT focuses on essential variables and full mechanical test coverage, while witnessing a WPQ focuses mostly on visual and bend or RT results tied to individual welder skill.
What documents should an inspector review before witnessing a PQT?
Before the arc is struck, review the draft WPS, base material certificates (MTRs) for the test coupon, filler metal certificates, calibration certificates for welding machine meters and temperature monitoring equipment, the qualification test plan, and confirmation of coupon dimensions against the applicable code figure.
Which essential variables must be verified during PQT witnessing?
Essential variables vary by process but commonly include base metal P-Number and thickness range, filler metal F-Number and A-Number, welding process, position, preheat and interpass temperature, heat input or travel speed limits, shielding gas composition and flow rate, and post-weld heat treatment if applicable, as listed in ASME IX QW-250 tables specific to each process.
Does the inspector need to witness the mechanical testing as well as the welding?
Best practice, and often a contractual requirement, is that the inspector witnesses both the welding of the coupon and the mechanical testing, including tensile, bend, and impact testing where required. Witnessing only the welding leaves a gap, since specimen extraction location, notch orientation, and test machine calibration can all affect whether the reported results are valid.
What happens if a PQT fails during witnessing?
If a specimen fails, the applicable code allows limited retesting, such as QW-153 for tensile retests or QW-160 for bend retests, using additional specimens from the same coupon in some cases, or a full retest with a new coupon in others. The inspector should document the failure mode, retain the failed specimen or photographs, and confirm which retest provision the fabricator intends to invoke before any new welding begins.
Can a PQT be qualified using a smaller test coupon than production thickness?
Yes, within limits. ASME IX allows a single coupon thickness to qualify a range of production thicknesses, governed by tables in QW-451 for most processes. Confirm the coupon thickness against the intended qualified range before testing begins, since welding a coupon that is too thin will restrict the usable production range regardless of how well the weld performs.