20 MIG Welding Tips & Tricks for Beginners
Last updated:
Quick Answer: Good MIG welds come from a short list of habits: clean bare metal and a solid work clamp, the right wire and shielding gas for the material, wire speed and voltage matched to the thickness, a short and consistent stickout, a comfortable two-handed stance with a 10-15 degree gun angle, a steady travel speed while watching the puddle, and testing every setup on scrap first. This guide gives 20 tips in that order, plus a troubleshooting table for spatter, porosity, and poor fusion.
MIG welding (gas metal arc welding, GMAW) is one of the quickest processes to learn: the machine feeds the wire for you, holds the arc length largely by itself, and forgives small hand movements. That does not make it foolproof. Most beginner problems, spatter, porosity, cold, ropey beads, and burn-through, trace back to a handful of setup and technique mistakes that are easy to fix once you know where to look.
The 20 tips below are grouped into preparation and safety, settings, technique, and finishing and practice. Where a tip involves a number, such as stickout or gun angle, the figure is a typical starting point; always defer to the wire and gas manufacturer’s data and any welding procedure that applies to your work.
- Most bad beginner welds start before the arc: dirty metal, a poor work clamp connection, or the wrong wire and gas.
- Wire feed speed mainly sets current and penetration; voltage mainly sets arc length and bead width. Set them as a pair and test on scrap of the same thickness.
- Keep stickout short and consistent, typically about 3/8 to 1/2 inch (10-13 mm) for solid wire; long stickout gives an erratic, spattery arc.
- Hold the gun with both hands at a travel angle of roughly 10-15 degrees, watch the puddle rather than the arc, and keep travel speed steady.
- Safety is part of technique: proper helmet, gloves, ventilation, and extra caution around galvanized or painted steel.
Preparation and Safety (Tips 1-6)
Tip 1: Clean the metal down to bare steel
Mill scale, rust, oil, grease, and paint all interfere with the arc and are common sources of porosity and spatter. Grind or wire-brush the joint and a strip of surrounding metal until it is bright, and wipe off any oil or cutting fluid.
Tip 2: Put the work clamp on clean metal, close to the weld
A weak ground connection causes an unstable arc and wire that stutters or stubs. Clamp to bare, clean metal, as close to the joint as practical, and check that the clamp and cable connections are tight.
Tip 3: Match wire and gas to the material
For mild steel, a common combination is solid ER70S-6 wire with a shielding gas of about 75 percent argon and 25 percent CO2 for smooth, low-spatter welding; pure CO2 is cheaper and penetrates deeper but spatters more. Aluminium needs aluminium wire and pure argon, and usually a spool gun or push-pull gun because the soft wire tangles in a standard feed. For outdoor or windy work, self-shielded flux-cored wire avoids the need for gas.
Tip 4: Choose a wire diameter that suits the thickness
Thinner wire (for example 0.030 in / 0.8 mm) suits thin sheet and lower current; general-purpose 0.035 in (0.9 mm) covers a wide range of light fabrication. Using wire that is too large for thin metal makes burn-through more likely, while wire that is too small for thicker metal makes it hard to get enough deposition.
Tip 5: Check polarity and gas flow
Solid wire with shielding gas normally runs DC electrode positive (DCEP), while many self-shielded flux-cored wires run electrode negative; the wire maker’s data sheet says which. Set gas flow within the range recommended for your nozzle and wire, commonly in the region of 15-25 cubic feet per hour (roughly 7-12 litres per minute), and shield the weld from drafts, since wind blows the gas away and causes porosity.
Tip 6: Put safety first
Wear a properly rated auto-darkening helmet, insulated gloves, and flame-resistant clothing, and weld in a ventilated area away from flammables. Take particular care with galvanized or coated steel: burning off the zinc or coating releases fumes that can make you ill, so remove the coating from the weld area and ventilate well.
Caution: Never weld on containers that have held fuel or chemicals, and never weld on painted or galvanized surfaces in a closed space without proper ventilation and, where required, respiratory protection. If in doubt, stop and check the workplace safety rules.
Machine Settings and Setup (Tips 7-12)
Tip 7: Start from the chart, then fine-tune
Most machines have a setup chart inside the door or on the panel giving starting wire speed and voltage by material thickness and wire size. Use it as your starting point rather than guessing, then adjust by sound and appearance.
Tip 8: Test on scrap of the same thickness and joint type
Make a short weld on offcuts before touching the real part. A smooth, steady crackle, often compared to bacon sizzling, usually means the settings are close for short-circuit transfer. A harsh popping with lots of spatter means wire speed and voltage are out of balance.
Tip 9: Treat wire speed and voltage as a pair
On a constant-voltage MIG machine, wire feed speed mainly sets welding current and therefore penetration, while voltage mainly sets arc length and bead width. Too much voltage for the wire speed gives a long, wide, spattery arc; too little gives stubbing and a narrow, humped bead. Change one at a time and re-test. The relationships are explained in the guides on arc length, voltage, and welding current linked below.
Tip 10: Keep stickout short and consistent
Stickout is the length of unmelted wire between the contact tip and the arc. For solid wire, about 3/8 to 1/2 inch (10-13 mm) is a typical target. Too short and the nozzle hides the puddle and the arc turns erratic; too long and the wire preheats, the arc wanders, and spatter and a wide, thin bead result. Keeping it constant matters as much as the exact figure.
Tip 11: Keep the trigger end in good shape
Trim the wire to a clean end before starting so a molten ball does not cause a rough start. Replace worn or spatter-clogged contact tips, keep the nozzle clear of spatter (anti-spatter gel helps), and replace a dirty or kinked liner. A worn tip or liner is a common cause of erratic wire feed and a wandering arc.
Tip 12: Set drive roll and spool tension correctly
Drive roll tension should be just enough to feed the wire without slipping; over-tightening squashes the wire and can cause feeding problems and burnback. Spool brake tension should stop the spool from overrunning when you release the trigger, without making the wire hard to pull.
Technique (Tips 13-18)
Tip 13: Build a stable, comfortable stance
Hold the gun with your dominant hand and support it with the other so it does not shake, resting an elbow or forearm on the work or bench where you can. Position yourself so you can see the puddle and move along the whole joint without stretching. Do a dry run with the power off to check you can complete the weld comfortably.
Tip 14: Use a sensible travel angle, and choose push or drag on purpose
A travel angle of roughly 10-15 degrees from vertical is a good starting point. Pushing (gun pointing in the travel direction) gives a flatter, wider bead with shallower penetration and better visibility, and is common with solid wire on thin material. Dragging gives deeper penetration and a taller bead. For slag-producing flux-cored wire, drag is the norm. The effect of angle is covered in more detail in the electrode angle guide.
Tip 15: Get the work angle right
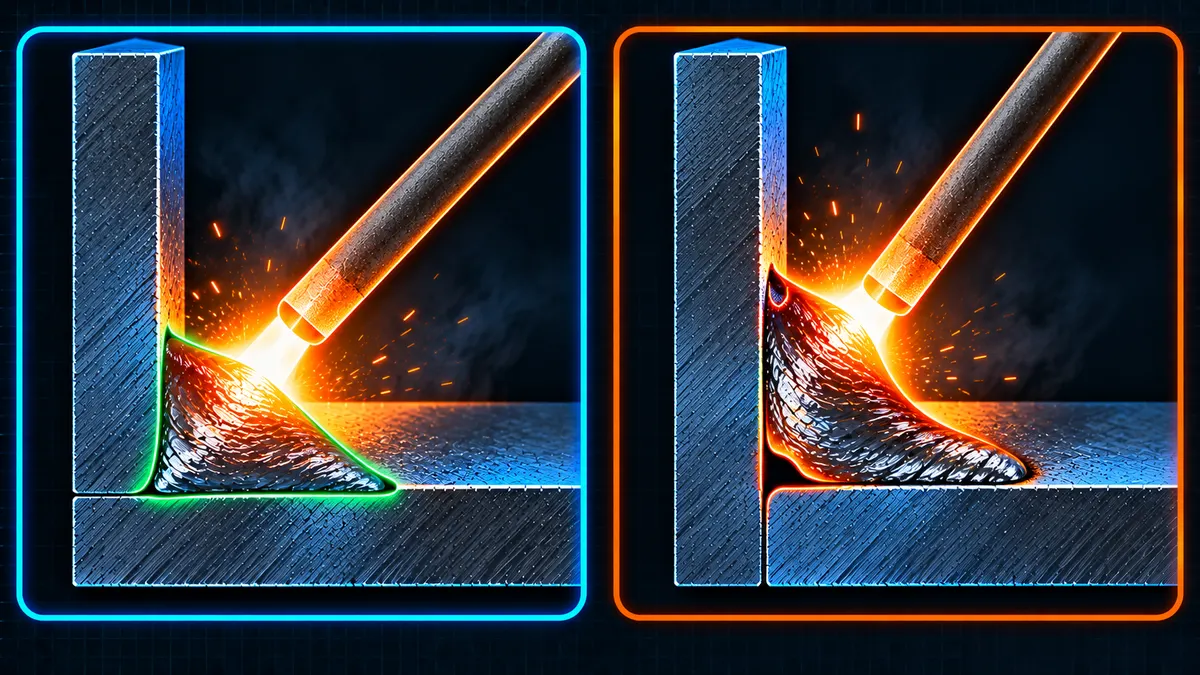
For a T-joint or fillet weld, aim the wire so it bisects the joint, roughly 45 degrees to each plate, so both members fuse. Favoring one plate leaves undercut on one side and poor fusion on the other; on unequal thickness, aim slightly more at the thicker piece.
Tip 16: Watch the puddle, not the arc
The puddle tells you what is happening. Keep the arc at the leading edge of the puddle, watch that it wets out to both toes, and adjust speed to keep its size steady. Staring at the bright arc hides the information you need.
Tip 17: Keep travel speed steady
Too fast gives a narrow, ropey bead with poor fusion and possible undercut; too slow piles up metal, overheats the joint, and on thin material burns through. Aim for a smooth, even movement that keeps the bead width consistent, adjusting speed rather than voltage to fix width problems along the way.
Tip 18: Use the right motion for the joint and thickness
Straight stringer beads suit most thin and root work. A small side-to-side weave can help fill wider joints in flat or horizontal positions but should stay narrow. On thin sheet, short stitches or skip welds let the metal cool between bursts and reduce burn-through and warping.
Finishing and Practice (Tips 19-20)
Tip 19: Fit up carefully, tack, and manage distortion
Good fit-up saves more time than any trick with the gun. Hold parts with tack welds spaced sensibly, keep gaps even, and clamp where needed. To limit warping, weld in short sections, alternate sides, skip or backstep along long seams, and let thin parts cool between passes.
Tip 20: Fill the crater, inspect your welds, and keep practicing
At the end of a weld, pause briefly to fill the crater and let the gas post-flow protect it, since unfilled craters can crack. Then look at the result: check for porosity, undercut, cold lap, and even bead width. Practise on scrap and, where safe, bend or break test a sample so you can see whether fusion reached the root. Consistent practice is the fastest route to consistent welds.
Field tip: Keep a small notebook or photo log of the settings that worked for each combination of wire, gas, and thickness. It turns trial and error into a personal reference chart that beats memory every time.
Troubleshooting Quick Reference
| Problem | Likely Cause | Fix |
|---|---|---|
| Excess spatter | Voltage too high or too low for wire speed, long stickout, dirty metal | Rebalance voltage and wire speed, shorten stickout, clean the metal Tips 1, 9, 10 |
| Porosity (small holes) | Gas flow too low or too high, draft, dirty metal, blocked nozzle | Check flow and hoses, shield from wind, clean metal and nozzle Tips 1, 5, 11 |
| Wire stubbing into the plate | Voltage too low, stickout too short | Raise voltage slightly, lengthen stickout to target Tips 9, 10 |
| Wide, flat, thin bead | Voltage too high, travel too slow, long stickout | Reduce voltage, speed up, shorten stickout |
| Narrow, ropey bead with poor fusion | Travel too fast, current too low | Slow down or raise wire speed Tips 9, 17 |
| Burn-through on thin metal | Current too high, travel too slow, wire too large | Lower settings, use stitching, smaller wire Tips 4, 18 |
| Undercut or lack of fusion on one side | Poor work angle | Re-aim to bisect the joint Tip 15 |
| Erratic feed or arc | Worn tip or liner, wrong drive roll tension | Replace tip or liner, adjust tension Tips 11, 12 |
Common Mistakes and Limitations
- Skipping scrap tests. Adjusting settings on the real part wastes material and hides whether the problem is setup or technique.
- Chasing spatter with the wrong dial. Spatter is often stickout, gas, or cleanliness rather than a machine setting; check these before changing voltage again.
- Welding through mill scale, rust, or paint. It may seem to work, but it invites porosity and weak fusion.
- Too much gas flow. More is not better; excess flow causes turbulence that draws air into the shield and can cause the same porosity as too little.
- Assuming settings carry over. A setup that works on one wire, gas, or thickness will not necessarily work on another; re-test whenever something changes.
- Using beginner rules for code work. These tips are general guidance; production and code welding must follow the qualified welding procedure, and welders must be qualified to it.
Specific settings and limits depend on the wire, gas, machine, and joint; follow manufacturer data and any applicable welding procedure for your work.
Key Terms
- Stickout
- The length of unmelted electrode wire extending from the contact tip to the arc.
- Contact-Tip-to-Work Distance (CTWD)
- The distance from the contact tip to the workpiece, equal to stickout plus arc length.
- Short-Circuit Transfer
- A MIG metal transfer mode at lower current and voltage in which the wire repeatedly touches the puddle and briefly short-circuits; common for thin material and out-of-position work.
- Wire Feed Speed (WFS)
- How fast the wire is fed to the arc, which mainly determines welding current and deposition rate on a constant-voltage machine.
- Porosity
- Gas pockets trapped in solidified weld metal, often from poor shielding or contamination.
- Burnback
- The wire melting back and fusing to the contact tip, often caused by feed problems or incorrect settings.
Frequently Asked Questions
What shielding gas should a beginner use for MIG welding steel?
A mixture of about 75 percent argon and 25 percent CO2 is a common choice for mild steel, giving a smooth arc and low spatter. Pure CO2 is cheaper and penetrates deeper but produces more spatter. Aluminium needs pure argon. Always follow the wire and gas manufacturer’s recommendations for your application.
Should beginners use solid wire or flux-cored wire?
Solid wire with shielding gas gives cleaner, lower-spatter welds and suits indoor work on clean material, especially thin metal. Self-shielded flux-cored wire needs no gas, which makes it convenient for outdoor or windy conditions and thicker material, but it produces slag that must be removed and generally more smoke.
Why is my MIG weld spattering so much?
Common causes are voltage and wire speed out of balance, stickout that is too long, dirty or rusty metal, poor gas coverage, and a bad work clamp connection. Clean the metal, shorten stickout, check the ground and gas, and retune voltage against wire speed on scrap.
Should I push or drag the MIG gun?
With solid wire and gas, pushing generally gives a flatter, wider bead with shallower penetration and better visibility, while dragging gives deeper penetration and a taller bead. With slag-producing flux-cored wire, dragging is the norm to keep slag behind the puddle. Choose based on material thickness and the bead you want.
How long should the wire stickout be?
For solid wire, a typical target is about 3/8 to 1/2 inch (10-13 mm). Too short gives an erratic arc and a hidden puddle, while too long causes wandering, more spatter, and a wide, thin bead. Follow the wire maker’s guidance, since flux-cored wires often use a longer stickout.
Can a beginner MIG weld aluminium?
It is possible but harder than steel. Aluminium needs aluminium wire and pure argon, and the soft wire usually needs a spool gun or push-pull gun to feed reliably. The metal also needs thorough cleaning to remove oxide, and it conducts heat quickly, so settings and technique differ from steel.
What causes porosity in MIG welds?
Porosity usually comes from poor shielding or contamination: gas flow too low or too high, drafts blowing the gas away, a clogged nozzle, leaking hoses, or dirty, rusty, oily, or painted metal. Check gas supply and flow, shield the weld from wind, clean the nozzle, and prepare the metal properly.
Standards and References
- MSC Direct betterMRO, “Laying Down a Good MIG Weld: 5 Tips for Beginners” – guidance from Lincoln Electric and ESAB welding specialists on shielding gas, wire, settings, and angles.
- AWS A5.18/A5.18M, Specification for Carbon Steel Electrodes and Rods for Gas Shielded Arc Welding, American Welding Society – classification of solid MIG wires such as ER70S-6.
- ANSI Z49.1, Safety in Welding, Cutting, and Allied Processes, American Welding Society – protective equipment, ventilation, and fume safety.
Conclusion
MIG welding rewards preparation and consistency more than talent. Clean metal, a solid ground, and the right wire and gas remove most causes of spatter and porosity before you strike an arc; settings tuned on scrap and a short, steady stickout handle most of the rest; and a comfortable stance, sensible gun angles, and a steady travel speed turn a good setup into a good bead. Work through the 20 tips, keep notes on what works, and use the troubleshooting table when a weld goes wrong. When you are ready to go deeper, the guides on arc length, voltage and bead width, welding current and penetration, and electrode angle explain the reasons behind these habits.
About This Guide: This article was prepared by the WeldFabWorld technical team from the references listed above and general welding practice. Values such as stickout, gas flow, and gun angle are typical starting points; verify against the wire and gas manufacturer’s data, your equipment manual, and any welding procedure specification that applies to your work.